Yes. With proper preparation, the right equipment, and strict safety discipline, it is possible to melt and cast aluminum at home for hobby parts, art, or small repairs. Successfully melting and casting aluminum in a home or small-scale foundry requires heating the metal to its melting point of 660.3°C (1220.5°F), though a pouring temperature between 700°C and 750°C (1292°F – 1382°F) is operational standard to ensure fluidity.
What does aluminum casting at home really involve?
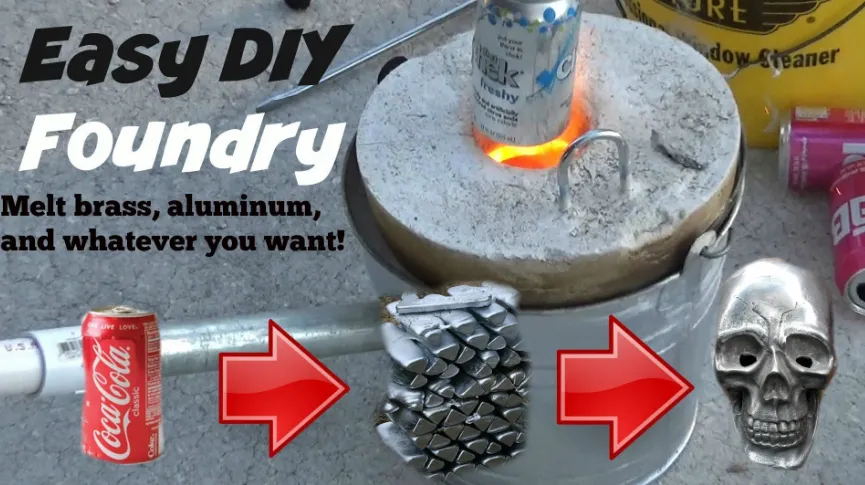
Home aluminum casting means heating aluminum or aluminum scrap above its melting range, transferring the molten metal into a prepared mold, allowing it to solidify, and performing finishing operations. Pure aluminum melts at about 660 °C (1220 °F), but alloys common in scrap and castings vary in melting temperature and fluidity. Understanding alloy behavior, oxide formation, and how moisture or contaminants interact with molten metal is critical to safe, successful casting.
What are the primary hazards and how to manage them?
Key hazards include thermal burns, molten metal splash, fires, toxic gases from coatings and fluxes, and explosive steam events if water contacts molten metal. A single drop of liquid water turning to steam inside hot metal or a mold can cause a violent spatter incident. Managing these hazards requires engineered controls, full personal protective equipment, verified dry molds and feedstock, and emergency planning.
Personal protective equipment (PPE) checklist
| Item | Purpose | Notes |
|---|---|---|
| Heat-resistant face shield + safety glasses | Protects eyes and face from radiant heat and splash | Face shield should be rated for molten metal work |
| Leather apron and jacket; long sleeves (natural fiber) | Protects torso and arms from splashes | No synthetic fabrics; they melt to skin. |
| Heat-resistant gloves (leather) | Handling tongs, crucible covers | Gloves should be loose-fitting enough to remove quickly |
| High-top leather boots | Protect feet from splashes and hot debris | Steel-toe boots are common; keep laces tucked. |
| Respirator (organic vapor/particulate) | Protects from fumes when using fluxes or burning coatings | Use if burning paints/coatings on scrap |
| Hearing protection | Blowers and burners can be loud | Use ear protection when needed |
PPE must be fitted, maintained, and used consistently. Training in donning/doffing and emergency procedures is essential.
Video Introduction: How to easy aluminum casting at home.
What equipment choices work for a safe home setup?
Below are practical options ranked by cost, complexity, and suitability for home work.
Furnaces and heat sources
| Option | Max temp / capability | Pros | Cons | Typical user |
|---|---|---|---|---|
| Propane-fired crucible furnace (commercial) | >700 °C | Compact, controllable, readily available parts | Fuel cost, ventilation needed | Hobbyists, beginners |
| Charcoal/coal with forced air (DIY) | Can reach required temps | Low cost, simple | Harder to control, soot and fumes | Traditional DIY setups |
| Electric resistance furnace (kiln-style) | High temps, controllable | Cleaner operation, precise | Expensive, high power draw | Serious hobbyists, small shops |
| Induction furnace (small scale) | Fast, efficient | Clean, precise control | High cost, more complex electronics | Advanced users, small production |
Choosing a furnace depends on budget, local regulations, and whether you prioritize cleanliness, control, or simplicity. Commercial crucible furnaces are a good balance for most home foundries. Always follow manufacturer instructions and maintain safe clearances and ventilation.
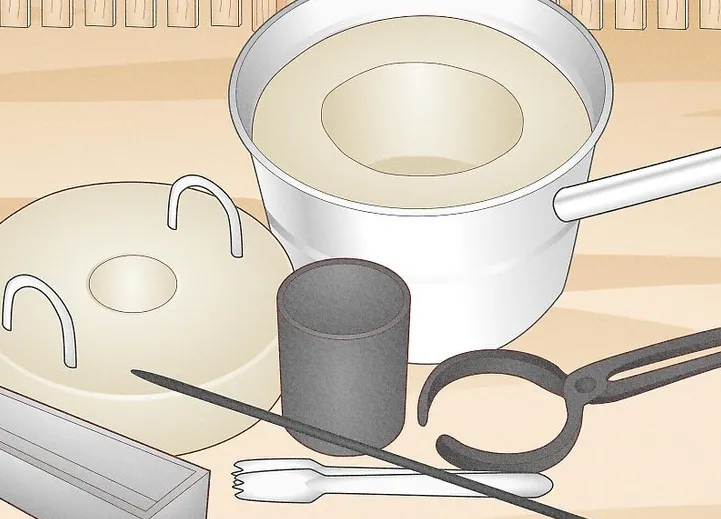
Crucibles and tools
-
Crucible materials: Silicon carbide, graphite, and clay-graphite crucibles are common for aluminum. Choose crucibles rated for aluminum temperatures and compatible with your furnace type.
-
Tongs, pouring shanks, and skimming tools: Must be rated for molten metal and in good condition.
-
Thermocouple or pyrometer: For reasonable temperature awareness. For molten aluminum, knowing approximate temperature is critical.
-
Fluxing tools and ladles: Specialty ladles with long handles and crucible-fitting design reduce splash risk.
What aluminum feedstock should you use and how to prepare it?
Feedstock types
| Feedstock | Typical composition and concerns |
|---|---|
| Cast aluminum scrap (old castings) | Often 3xx or 4xx series alloys; may be acceptable for re-melting |
| Extrusion and sheet scrap | May be 6xxx series or 1xxx; varying melting ranges |
| Beverage cans | Thin, alloy content varies; large oxide film and contamination risk |
| New ingots | Best choice for predictable properties, least contamination |
| Mixed household scrap | Contains paints, plastics, steel, other contaminants; higher processing needed |
Using known alloys or virgin ingots yields better mechanical properties and fewer surprises in melting behavior.
Preparation and cleaning
-
Remove non-metallic parts such as plastics, paints, and adhesives.
-
Preheat and dry scrap that has been wet or contaminated; never introduce visibly wet material.
-
Chop large pieces into manageable sizes to melt more evenly.
-
Use mechanical separation to remove ferrous contaminants when possible.
Which mold materials and processes are practical at home?
Different casting processes suit different geometries, detail levels, and production volume.
Common home casting processes
-
Green sand casting: Uses sand mixed with clay and moisture to form molds. Good for larger, simpler parts. Requires careful drying of cores and gating to reduce moisture entrapment.
-
No-bake or chemical-bonded sand: Better dimensional control, less moisture risk, but uses chemicals and is more complex.
-
Investment casting (lost wax): Delivers high detail. The wax and investment materials must be handled carefully; burnout must eliminate all moisture.
-
Permanent molds (gravity-fed metal molds): Good for repeated parts; requires proper mold material selection and release coatings.
-
Plaster or rubber molds: Useful for small runs; must be fully dry and compatible with aluminum temperature.
Each method has tradeoffs in surface finish, complexity, and safety. For most beginners, sand casting with well-dried patterns is a sensible starting point.
Table comparing mold types
| Mold type | Detail level | Reusability | Moisture sensitivity | Typical home use |
|---|---|---|---|---|
| Green sand | Moderate | Reusable | High if not dried | Larger shapes, low cost |
| No-bake sand | Moderate-high | Reusable | Lower | Better dimensional control |
| Investment (wax) | Very high | Single-use | Low after burnout | Jewelry, precision parts |
| Permanent metal mold | Moderate | Reusable many times | Low | Small production runs |
| Plaster | High | Single-use or few times | High if not dried | Small artistic pieces |
How to plan a safe melt and pour procedure (conceptual steps)
Below are conceptual steps rather than a play-by-play. These describe the logical sequence and safety checkpoints you must enforce.
-
Design and calculate the part: account for shrinkage, draft, and gating to ensure metal will flow and solidify properly.
-
Select and prepare the mold: ensure molds and cores are bone dry and tested for leaks.
-
Choose the alloy or feedstock: pick a known alloy when mechanical properties matter; sort and pre-clean scrap.
-
Prepare equipment and PPE: test furnace, tools, and emergency gear; ensure clear workspace.
-
Charge and bring metal to melt: add metal in controlled batches, skimming oxides frequently.
-
Clean and flux the molten metal if needed to remove oxides and dissolved gases.
-
Temperature awareness: avoid overheating; aluminum evaporates/oxidizes more at higher temps.
-
Controlled pour: steady pour rate, avoiding splashing; use trained helpers if needed.
-
Post-pour cooling and shakeout: wait until safe to handle; remove gating and flash.
-
Finishing and inspection: file, grind, machine, or heat treat as appropriate.
This conceptual approach reduces impulsive steps that increase risk. The emphasis is on quality control and safety rather than shortcutting.
Flux, degassing, and common process chemistry points
-
Oxide skin (dross) forms rapidly on molten aluminum; skim it off. Dross removal improves soundness.
-
Fluxes can help aggregate inclusions and make skimming easier. Use flux products designed for aluminum casting and follow safety data sheets.
-
Hydrogen porosity arises because molten aluminum dissolves hydrogen; as the metal cools, hydrogen comes out of solution and forms pores. Degassing techniques (argon rotary degassing for industrial shops) and clean, dry feedstock reduce porosity. For home hobbyists, controlling contaminants and minimizing turbulence are practical approaches.
Common casting defects and how to reduce them
| Defect | Typical cause | Mitigation |
|---|---|---|
| Porosity | Dissolved hydrogen, trapped gases | Dry feedstock, reduce turbulence, use degassing if possible |
| Cold shuts | Metal temperature too low or poor gating | Increase melt temp slightly, redesign gating for better flow |
| Inclusions/dross | Oxides, contaminants | Skim dross, use flux, pre-clean feedstock |
| Shrinkage cavities | Poor risering design | Add risers/feeders and allow directional solidification |
| Hot tears | Restraint during solidification | Modify part geometry, provide proper choke points |
Addressing defects is both engineering and craft; iterate on gating, risers, and temperature control to improve outcomes.
Post-cast finishing and testing
-
Shakeout and cleaning: Break sand molds or separate investment material after safe cooling.
-
Grinding and machining: Remove gates and flash with appropriate grinders and guards.
-
Heat treatment: Some aluminum alloys respond to solution heat treatment and aging. If mechanical properties matter, select an alloy and follow proven tempering schedules. For many home projects, mechanical finishing suffices.
-
Non-destructive testing: Visual inspection for surface defects; cross-sectional examination or dye-penetrant tests for critical parts.
If parts are structural or safety-critical, consider laboratory testing or outsourcing final production to a certified foundry.
Environmental and legal considerations
-
Local regulations: Check local fire codes and zoning rules; some municipalities restrict open furnaces or certain fuels.
-
Disposal of dross and spent flux: Treat dross and chemical waste responsibly. Some dross contains recoverable aluminum; other residues must be handled per local waste rules.
-
Air quality: Ensure proper ventilation and avoid burning coatings that produce hazardous fumes.
Always verify compliance with local environmental and safety codes before operating a home foundry.
Sourcing materials and suppliers (purchasing guidance)
When buying equipment or consumables, prioritize reputable suppliers and products with clear specifications.
| Item | What to prioritize | Notes for purchasers |
|---|---|---|
| Crucible | Rated for aluminum, compatible size | SiC and graphite crucibles common |
| Furnace | Manufacturer safety documentation | Check max temp, fuel type, warranty |
| Flux | Product SDS and compatibility with alloy | Choose aluminum-specific fluxes |
| Molding sand and binders | Clean, industrial-grade | Avoid improvised binders with unknown chemistry |
| PPE | Rated for foundry work | Face shields and gloves specifically for molten metal |
Buying quality components reduces surprises and contributes to safer operations.
Troubleshooting checklist for beginners
-
If metal splashes on pour: check for moisture or contaminants in scrap or mold.
-
If porosity is excessive: reduce melt turbulence, clean scrap better, consider degassing or using vacuum/argon if available.
-
If metal refuses to fill thin sections: increase pour temperature slightly and check gating design.
-
If dross forms excessively: avoid overheating and skim more frequently.
Document each trial, keep variables controlled, and change one factor at a time to find root causes.
How to improve cast quality as a process matures
-
Move from crude gating patterns to engineered gating and risering using classic foundry texts.
-
Use thermal analysis or simple solidification sketches to plan feeding.
-
Invest in a reliable thermocouple and learn to read solidification behavior.
-
Consider small-pressure or vacuum-assisted systems for specialty parts, only after mastering safe gravity casting.
Example resource list for further study
-
Foundry handbooks and American Foundry Society training materials for safety and process fundamentals.
-
Practical home-foundry articles and experienced hobbyist posts explaining what to avoid and common beginner pitfalls.
Home Aluminum Melting & Casting: Safety & Technical FAQ
1. Is it legal to melt aluminum at home?
2. What temperature do I need to melt aluminum?
3. Can I melt aluminum cans for casting projects?
4. What protective gear is absolutely required?
Never compromise on safety. At a minimum, you require:
- Full Face Shield: Worn over safety glasses.
- Leather Welding Gloves: High-heat resistant.
- Natural Fibers: Wear only cotton or wool (synthetic fabrics melt to skin).
- Leather Boots: High-top to prevent metal from entering the boot.
- Respiratory Protection: If melting coated scrap or using fluxes.
5. How do I prevent explosions or violent splashing?
6. Which mold method should a beginner try first?
7. What crucible material is best for aluminum?
8. Should I use fluxes or degassing tablets?
9. Can I machine cast aluminum parts after pouring?
10. When should I consult a professional foundry?
You should outsource to a professional certified foundry like AdTech if you require:
- Structural Integrity: Parts for vehicles or load-bearing use.
- Certification: Official material test reports (MTRs).
- Tight Tolerances: Precision that exceeds sand casting capabilities.
- Safety: When the project scale exceeds your home safety facilities.
Final notes and safety reminder
Melting and casting aluminum at home is feasible and rewarding when performed by informed and careful practitioners. The technical points above outline the critical knowledge you must master before attempting a pour: material selection, temperature control, moisture elimination, proper PPE, suitable molds, and legal compliance. Start small, gather training from experienced foundry practitioners or accredited courses, prioritize safety over speed, and document your process improvements.
